PhpMyAdmin Installation
PhpMyAdmin is a nice web based database management and administration software and easy to install and configure under apache.Managing databases with tables couldnt be much simpler by using phpmyadmin.
All you need to do is:
apt-get install phpmyadmin
The phpmyadmin configuration file is located at:
/etc/phpmyadmin folder.
To setup under apache all you need to do is include the following line in /etc/apache2/apache2.conf
Include /etc/phpmyadmin/apache.conf
Now restart apache: /etc/init.d/apache2 restart
Point your browser to:
http://domain/phpmyadmin
Thats it!! MySQL and phpMyAdmin is Ready !!! Login with your mysql root password and create users to connect to database from your php script.
3. Mail Server Installation
- Postfix (Mail Transfer Agent MTA)
- Dovecot (IMAP/POP3 Server)
- SASL Authentication with TLS (Authenticate before sending mail outside network in Outlook)
- Squirrel Mail (Popular Web based Email)
As a beginner to linux it took about almost a month for me for proper installation of mail server and fixing necessary problems. I had real nightmares to configure this and so i decided that my hardwork would be helpful to linux community.
Note: If you install Postfix/Dovecot mail server you will ONLY be able to send mail within your network. You can only send mail externally if you install SASL authentication with TLS. As otherwise you get nasty
"Relay Access Denied" error.
3a. Install Postfix MTA (Mail Transfer Agent)
First install postfix package along with sasl with apt-get
apt-get install postfix postfix-tls libsasl2 sasl2-bin libsasl2-modules popa3d
During installation, postfix will ask for few questions like name of server and answer those questions by entering your domain name and select
Internet site for postfix.
Postfix configuration file is located at:
/etc/postfix/main.cf. You can edit this file using popular text editor
nano /etc/postfix/main.cf
Start or Restart Postfix Server:
/etc/init.d/postfix restart
/etc/init.d/postfix stop
/etc/init.d/postfix start
3b. Install Dovecot
Dovecot is one of the popular POP3/IMAP server which needs MTA like Postfix to work properly.
apt-get install dovecot
In some linux versions, the above might not work so you can install by specifying individual package names.
apt-get install dovecot-imapd dovecot-pop3d dovecot-common
Dovecot configuration file is located at:
/etc/dovecot/dovecot.conf
Before we proceed we need to make some changes with dovecot configuration file. Double check the following entries in the file if the values are entered properly.
nano /etc/dovecot/dovecot.conf
# specify protocols = imap imaps pop3 pop3s
protocols =
pop3 imap
# uncomment this and change to no.
disable_plaintext_auth =
no
pop3_uidl_format =
%08Xu%08Xv
I have noticed that in some ubuntu versions, most of the above parameters are not specified. You will need to insert the values if not specified or left empty. If you dont uncomment and change disable_plaintext_auth to no, you will get
"plain text authentication error" from outlook or mail clients.
Now, create a user to test our pop3 mail with outlook:
adduser <user_name>
Caution: Always create a separate user to test your mail or ftp. DO NOT LOGIN WITH ROOT ACCESS.
Restart Dovecot:
/etc/init.d/dovecot restart
Now, you can use your outlook express to test whether your new mail server is working or not. Just enter username: <user_name> with password in outlook.
Remember you will NOT be able to send email outside your network, you will be only be able to send within your domain or local network. If you attempt to send email you get nasty "relay access denied" error from outlook express. However, you should have no problems in receiving your email from outlook. Inorder to send email external email you will need to configure SASL authentication as described below.
3c. Configure SASL Authentication with TLS
SASL Configuration + TLS (Simple authentication security layer with transport layer security) used mainly to authenticate users before sending email to external server, thus restricting relay access. If your relay server is kept open, then spammers could use your mail server to send spam. It is very essential to protect your mail server from misuse.
Let us set up SMTP authentication for our users with postfix and dovecot.
Edit the postfix configuration file
/etc/postfix/main.cf and enter the few lines to enable authentication of our users
smtpd_sasl_auth_enable = yes
smtpd_sasl_local_domain =
yourdomain.com
smtpd_recipient_restrictions = permit_mynetworks,permit_sasl_authenticated,reject _unauth_destination
smtpd_sasl_security_options = noanonymous
On the Dovecot side you also need to specify the dovecot authentication daemon socket. In this case we specify an absolute pathname. Refer to this postfix manual
here
Edit
/etc/dovecot/dovecot.conf
Look for the line that
starts with auth default, before that insert the lines below.
auth default {
mechanisms = plain login
passdb pam {
}
userdb passwd {
}
socket listen {
client {
path = /var/spool/postfix/private/auth
mode = 0660
user = postfix
group = postfix
}
}
}
Now, rename previous
auth default to
auth default2. If you dont rename this then dovecot server will give you error like multiple instances of auth default.
Now restart all the components of mail server.
/etc/init.d/saslauthd restart
/etc/init.d/postfix restart
/etc/init.d/dovecot restart
Test whether your mail server works or not with your outlook express. Configure a user with a user name <user_name> (without @domain) and
make sure that you select
my server requires authentication. Under settings select
same as incoming mail server
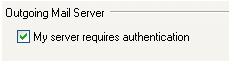 NOTE:
1. If you dont enable My server requires authentication in outlook you cannot send emails to external recipients and you get relay access denied error.
2. Do not use root login to login to your mail server.
3. Dont forget to create a new user before you authenticate using outlook.
NOTE:
1. If you dont enable My server requires authentication in outlook you cannot send emails to external recipients and you get relay access denied error.
2. Do not use root login to login to your mail server.
3. Dont forget to create a new user before you authenticate using outlook.


 پاسخ با نقل قول