Edit Setup
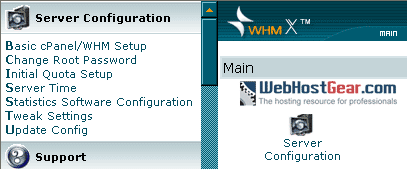
Now login to your WHM as the root user.
This is the main section to your web server where you can set the options once and will probably never need to change them.
Click on Basic cPanel/WHM Setup
Most of these sections are self explanatory with examples of what they do. Just read them to get familiar. I'll mention the important ones.
Main Shared Virtual Host IP:
This is your servers main IP address to be used be default with all shared hosting accounts. This should be setup by default and you probably won't need to change this unless you want to use a different IP.
Server Contact E-Mail Address:
You will get email alerts sent to this address and make sure you have a decent size inbox for them, something over 2 megs because you will often receive updates, log files and all kinds of other goodies. Preferrably an email account hosted on a different system like gmail, hotmail or yahoo. You don't want to have it mail your local accounts in the event of a problem.
Server Contact Pager Address:
Another contact method for receiving special alerts if your server goes down. We recommend leaving this empty and using a third party monitoring service like SiteUptime.com or Alertra.com because if your server is already down, how will it contact you
Default cPanel Theme:
The theme you want to be used be default with all new hosting accounts. There are a few to choose from and if you install a custom theme you can enter the name of it here. To see what themes you have installed on the server, scroll down to the left hand size and look for the title: Themes, click on List Installed cPanel Themes. Recommended theme: x
Default Home Directory:
We recommend setting this to: /home It should already be setup.
Home Directory Prefix:
Leave this set to home
Minimum Uid:
Leave blank
Alternate Main Ethernet Device:
Don't touch this unless you've setup a custom ethernet configuration. Read on..
Hostname:
Many people get confused about what this is. Basically you make up the prefix in it and apply the main domain used to host your sites to it.
Example: If the main site for the server was test123.com I could set the hostname to server1.test123.com or mars.test123.com The prefix helps you identify which server this is. Make sure to set your hostname properly by using the Change Hostname link at the top left, this should match what you set there.
NOTICE: In order for your system to be able to email and receive email other servers you need to use a VALID and WORKING domain name for this. Make sure the domain you choose is hosted on the server! Otherwise email will be rejected from your system in most instances.
Missing Hostname A record Warnings: Once you modify your Hostname you need to Add A DNZ Zone for it. This is to ensure when a mail server or systems checks to see if your server is online, it will respond. You can add an A record to your hostname in: Network Setup >> Hostname.
Primary Nameserver:
There are two options for these depending on what you're doing.
Option 1) Shared Nameservers
This is where you would use your datacentre's default name servers such as ns1.ev1servers.net and ns2.ev1servers.net
No other configurations are required making this a snap. You would when set all your domain names nameservers, that you want to put on the server , to the same name servers that you entered here. Keep in mind if you want to add things like a subdomain you have to go to your hosting providers domain system to add the DNS Zone changes. This is NOT recommended.
Option 2 Private Nameservers - A little harder but HIGHLY recommended
This can get very ugly if you don't know what you're doing. I strongly recommend you use your own private nameservers for your dedicated server. This is because you then have control of the DNS Zone associated with your site, so when you add things like subdomains you don't need to add them somewhere else because your server will handle everything. Cpanel Nameserver Guide here.
Primary Nameserver
ns1.yourserverdomain.com
Secondary Nameserver
ns2.yourserverdomain.com
Enter the correct names, click assign IP address. Then assign A entry for this nameserver. It's important you do not miss these steps and that your server has 2 free(available) IP addresses to use. Contact the datacenter if you're not sure. You can check what IP's are available in WHM >> IP Functions >> Show or Delete Current IP Addresses
Apache Access Log Style:
Set this to: combined


 پاسخ با نقل قول